
Step 1: The package
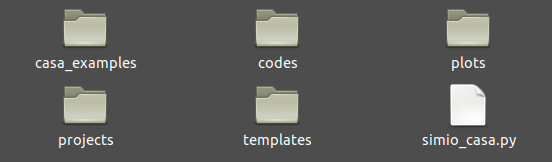
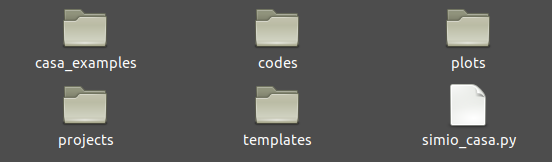
Open the SIMIO folder. You will see:
- codes: Where the functions and wrappers are located.
- plots: After creating your synthetic observation, you can use the functions within this folder to create further figures.
- projects: Your projects must be stored in this folder.
- templates: Your templates must be stored in this folder.
- casa_examples: Example codes to run SIMIO are stored in this folder.
- simio_casa.py: Example code to use SIMIO. Any SIMIO code should be run from this location:
~/path_to_simio/simio/.
Step 2: Include your template
Go into the templates/ folder. Add to your SIMIO the template that will generate your synthetic observation. SIMIO has HD163296 from DSHARP as the default template, and you can download others from this page.
Step 3: Create your project
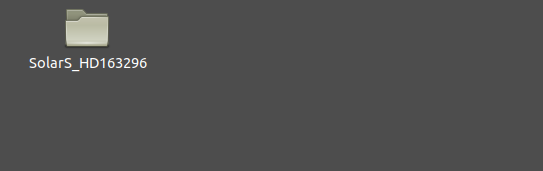
Create a folder with the name of your project in the folder projects/. You can use any name you want. In this example, our project will be named SolarS_HD163296 since we want to generate an observation of how the Solar System would look if DSHARP had observed it at the distance and geometry of HD163296.
Step 4: Prepare your project
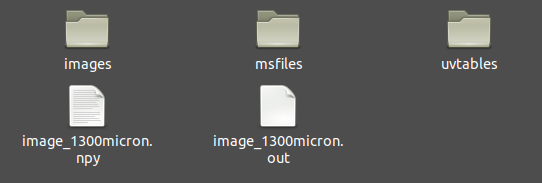
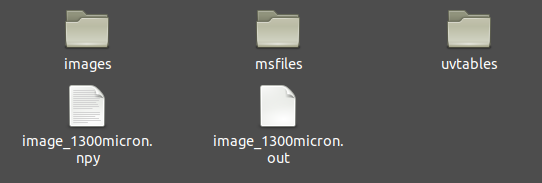
Go inside your project folder. In this example, we are inside the folder SolarS_HD163296/. Create the folders images, msfiles, and uvtables, and leave them empty. Add your radiative transfer image from RADMC-3D in .out or .npy format. In this example, our radiative transfer image is image_1300micron.out.
SIMIO will use the folders you just created to store:
- images: The FITS files generated with SIMIO will be stored in that folder. Check it after running the code.
- msfiles: Your synthetic observation will have its own measurement file, where the visibilities are stored. You will be able to find that file in this folder.
- uvtables: The visibilities will also be given in
.txtformat, which you can further use to analyze with other tools, such as frank or galario. The visibility table will be written inside this folder.
Step 5: Run SIMIO
Go back to the initial SIMIO folder. Open simio_casa.py and open CASA 5.6.2 in a terminal.
# Import needed python packages
import sys
import os
import numpy as np
import matplotlib.pyplot as plt

# Get the current directory path
current_dir = os.getcwd()+'/'
The first part of the code imports the necessary python packages, and sets the path to the SIMIO folder.
# Import the analysis utils functions
sys.path.append(current_dir+'codes/analysis_scripts/')
import analysisUtils as au

# Import the simio object
execfile(current_dir+'codes/simio_obj.py')

# Import functions for uv-handling
execfile(current_dir+'codes/simio_ms2ascii.py')

# Import functions for imaging
execfile(current_dir+'codes/simio_clean.py')
The second part is needed to load the SIMIO functions. Each subcode needs functions from the previous one, so it is necessary to execute them in the correct order.
You should not need to change anything in the import and execute-functions blocks.
###########################
# Solar System as HD163296
###########################

# Create a simio object.
simobj = simio_object(object_name = 'SolarS_HD163296',
                      im_file_name = 'image_1300micron.out',
                      template = 'HD163296',
                      use_tempgeom = True)
Create your simio_object, which is the basic object of the SIMIO package. This object will contain all the needed information to generate your synthetic observation.
- object_name: Write the name of your project, which you created in steps 3 and 4.
- im_file_name: Name of your radiative transfer image, including the format.
- template: Name of the template you want to mimic. In this example, HD163296.
- use_tempgeom: Set to
Trueif you want SIMIO to incline and rotate your image with the inclination and position angle of the template, under the assumption that your input is face-on. If your image already has the geometry you desire, and you do not want SIMIO to apply any geometric change, then set it toFalse.
# Create the measurement file of your simio object
# Can take several minutes
mod_ms = get_mod_ms(simobj)
The function get_mod_ms will take your image and generate the measurement set, replacing the observation of the template. You will receive the path to the measurement set in the variable mod_ms as an output of the code.
# Create masks
mask_obj = simobj.get_mask(mask_semimajor=0.65)
mask_res = simobj.get_residual_mask()
Create the masks to CLEAN the synthetic observation, and generate the images. These masks will be loaded into simobj and returned as strings.
- mask_obj: An elliptical mask with the geometry of the template. You can set the semi-major axis of the ellipse in units of arcsec.
- mask_res: Generates an annulus mask that will be used to calculate the background properties of your image.
# Generate image for your simio object.
# Can take several minutes, maybe an hour.
easy_mod_tclean(simobj, interactive=True)
Your synthetic observation has already been generated, but now we need to generate the images. The function easy_mod_tclean is a wrapper of the function tclean and simobj, which runs the CLEAN algorithm over your new observations.
Set interactive to True to see if the mask includes all the emission. Press the green arrow to start a cycle of the cleaning process, or alternatively, press the blue arrow and wait until it is done.
Depending on your computer and template, this step can take from a few minutes to an hour. Be patient.
Step 6: Check the results
Go back to the project folder. After executing get_mod_ms, you will find the measurement set and the visibilities table in their folders. After running easy_mod_tclean, you will get the products in the images folder.
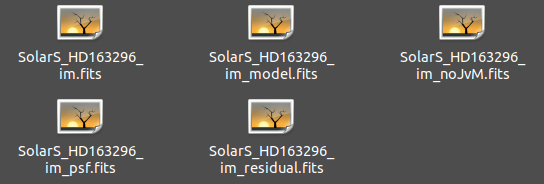
The images will be named by your project name, plus a suffix. Each image is:
- project_im.fits: Beam-convolved image, with the JvM correction (Czekala et al. 2021). This is how your source would look if ALMA had observed it with the same setup as the template.
- project_im_model.fits: The model image generated by the CLEAN algorithm, as a description of the visibilities of your source.
- project_im_noJvM.fits: Beam-convolved image without the JvM correction.
- project_im_psf.fits: The PSF of the observation.
- project_im_residual.fits: The residuals of the CLEAN algorithm. These residuals will be very structured, as the generated measurement set does not contain noise. However, they should be very small in total flux.